

User Interface
You may have noticed we glossed over some parts of the user interface in the basics guide. They aren't terribly important when you're playing your first character, but as you gain skills and items, you'll want to familiarize with them. So let's take a closer look at the vertical edges of the screen and the UI elements arranged along them.
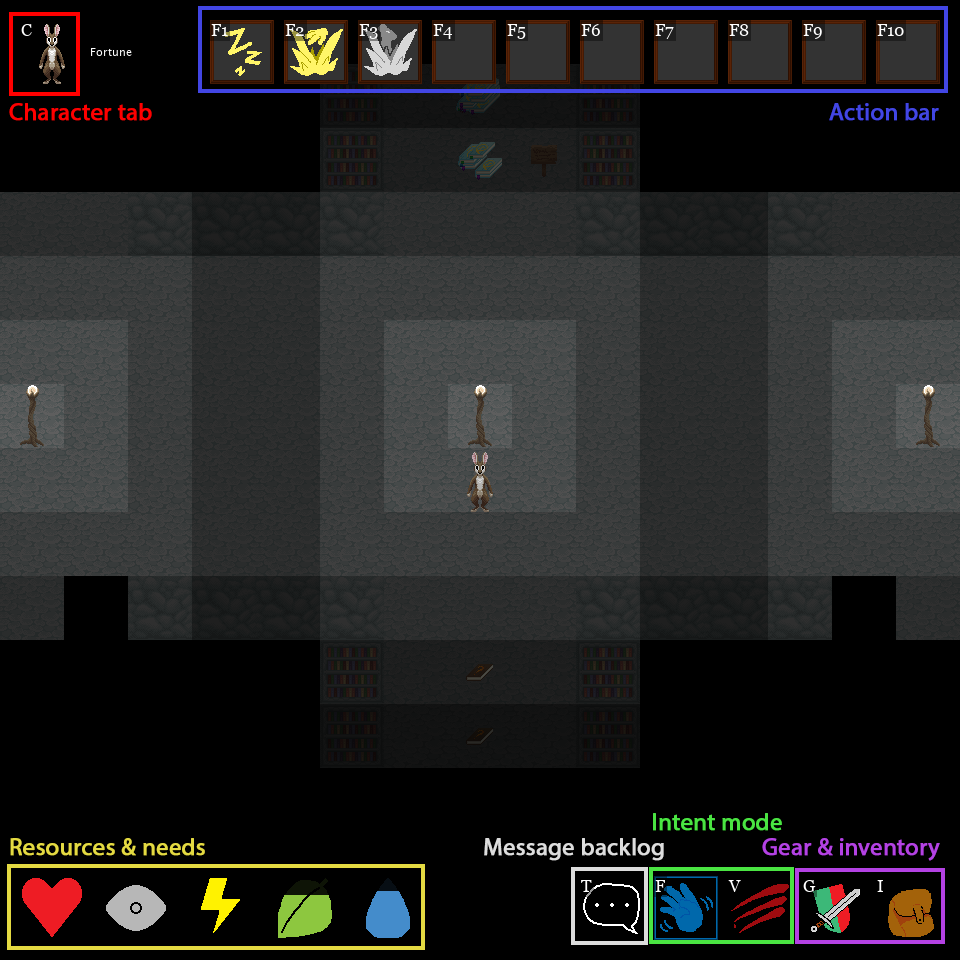
From left to right, top to bottom, six different important UI elements have been marked for you in the image below. Let's go through each of them in turn and provide a brief overview before we dive into detail on what each of them do.
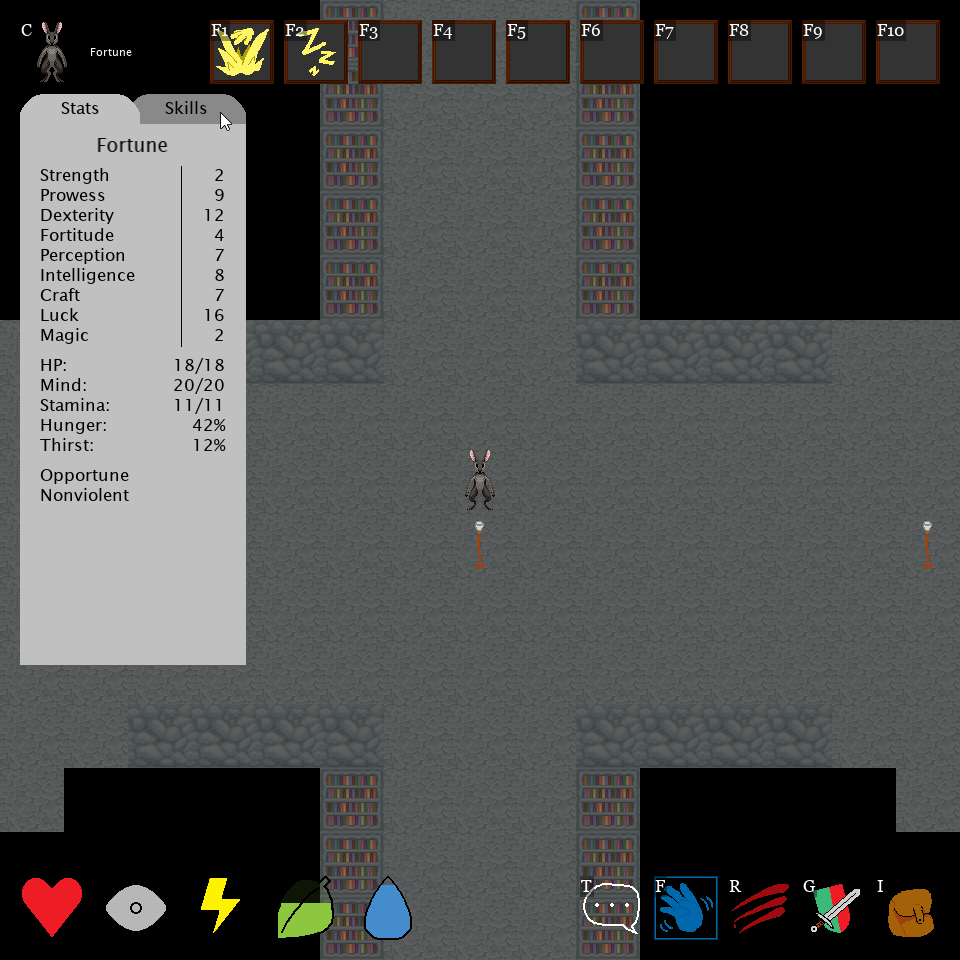
- Outlined in red, we have the character menu. This menu displays an overview of your character, their stats, their needs and resources, and the traits you've chosen. It also contains the Skills tab which you can switch to by clicking on it, which provides a list of all your skills as well as your available skill points. The C key will bring up your character menu.
- Adjacent to it, outlined in blue, is your action bar. Most of what will be occupying it are active skills, which you must assign to the bar in order to use. The F1-F10 keys are hotkeys to use the actions as labelled, and you can hover over them to see exactly what action you're performing.
- In the bottom left, outlined in yellow, are your resources & needs. From left to right, these are health, mind, stamina, hunger, and thirst. You can hover over them to see exactly what number each of them is at without opening your character menu, but they will empty out as each resource is expended, providing you a HUD of your character's needs.
- To the right of it, outlined in white, is the message backlog. Opening this will provide a log of all messages you have received in your current session as well as anything anyone has said or done around you, to help you remember it. You can quickly open it with the T key.
- Directly to the right of that are your intent modes, outlined in green. The blue icon is friendly intent, in which you cannot use hostile skills. You can press F to enter friendly intent. The red icon is hostile intent, in which your hostility is displayed to other characters and your double-click becomes an attack. You can press R to quickly enter hostile intent.
- At the bottom right, outlined in purple, are your gear and inventory buttons. All items you're carrying are arranged in your inventory, accessed with the I key, where you can right-click on them to do things with them. Opening your gear menu by clicking on the button or using the G key will open your gear menu as well as your inventory, allowing you to drag things between them.
Character Menu
(top)First, let's dissect the character menu a little. At the top of the skills tab is displayed your character's name, followed by their scores in each stat. Underneath that are all of your resources and needs as shown in the HUD on the bottom left, in easy-to-digest numbers. Finally, at the bottom your traits are listed, for easy reference.
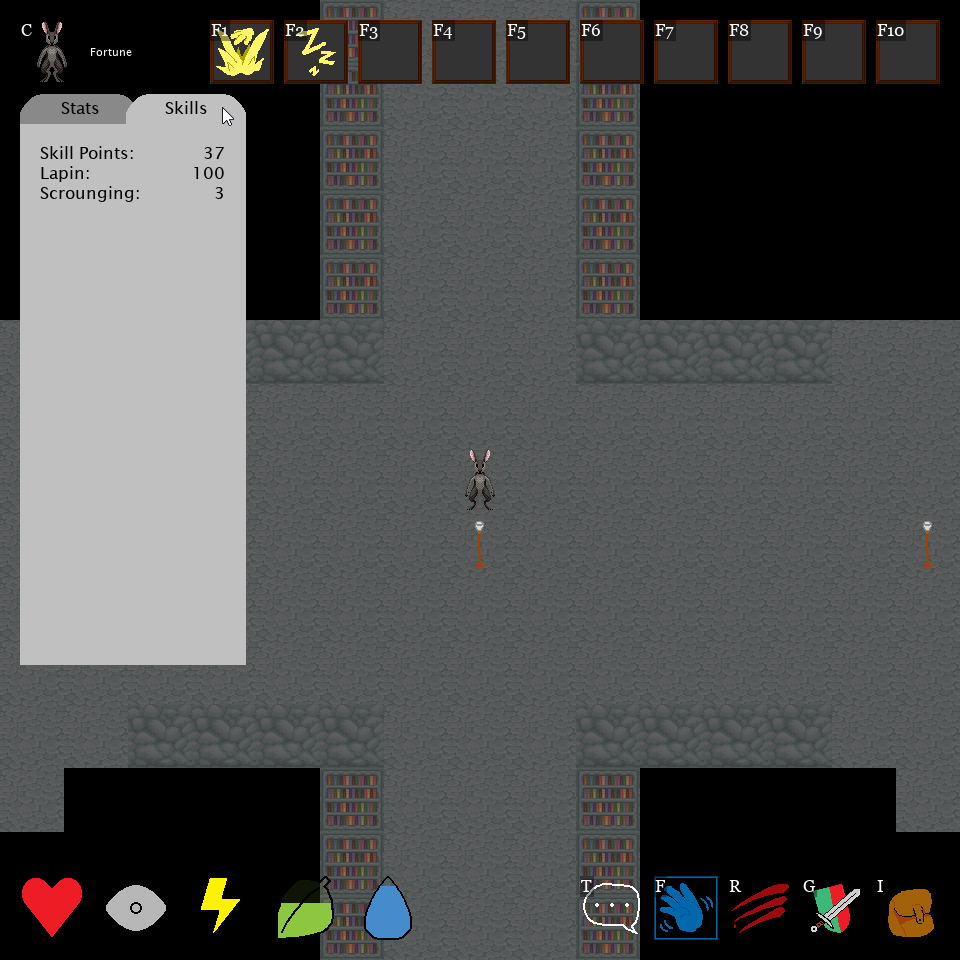
Clicking on the Skills tab to switch over, we are presented with a list of our character's skills. Remaining skill points are displayed at the top, followed by all the skills that you have levels in, in order of how many levels you have in them. Very straightforward!
Action Bar
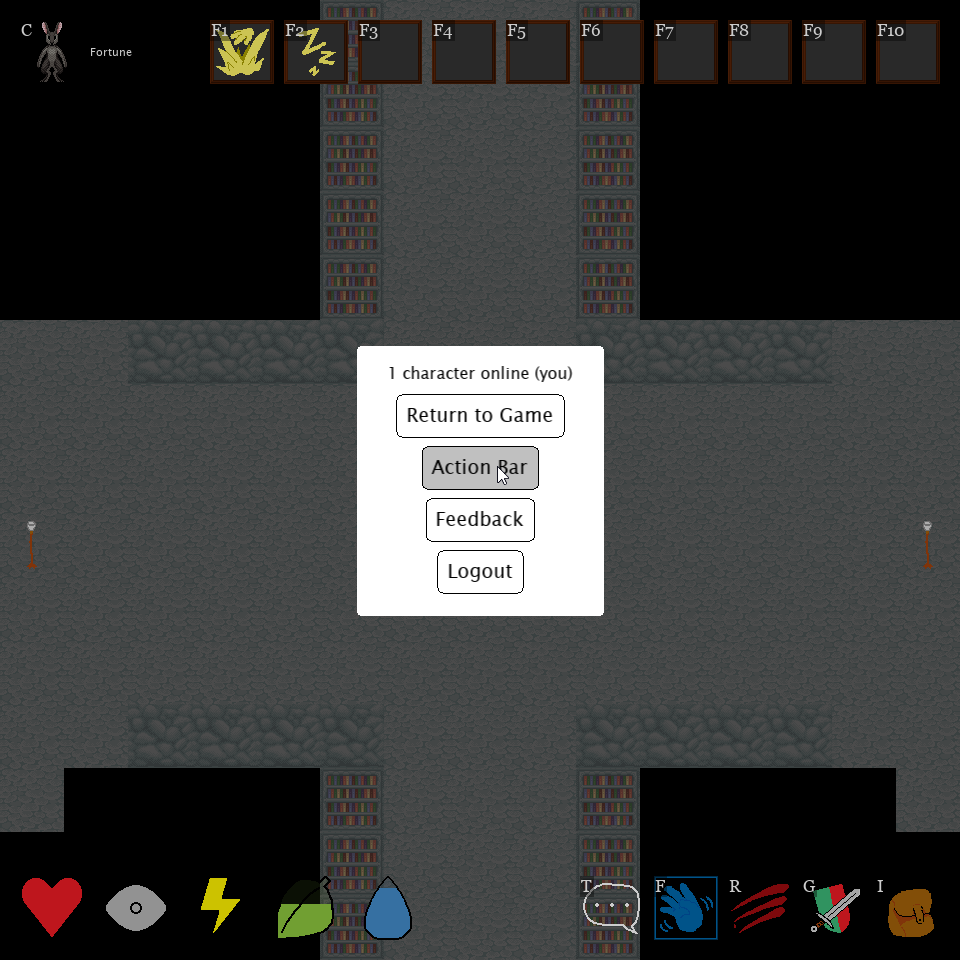
(top)While most actions are going to correspond to skills that you learn, some of them are innate to the character, and all of them have to be assigned to the action bar before you can use them. To do this, simply press Escape until you bring up the main menu, and click on Action Bar to be presented with a list of available actions and their assigned hotkeys.
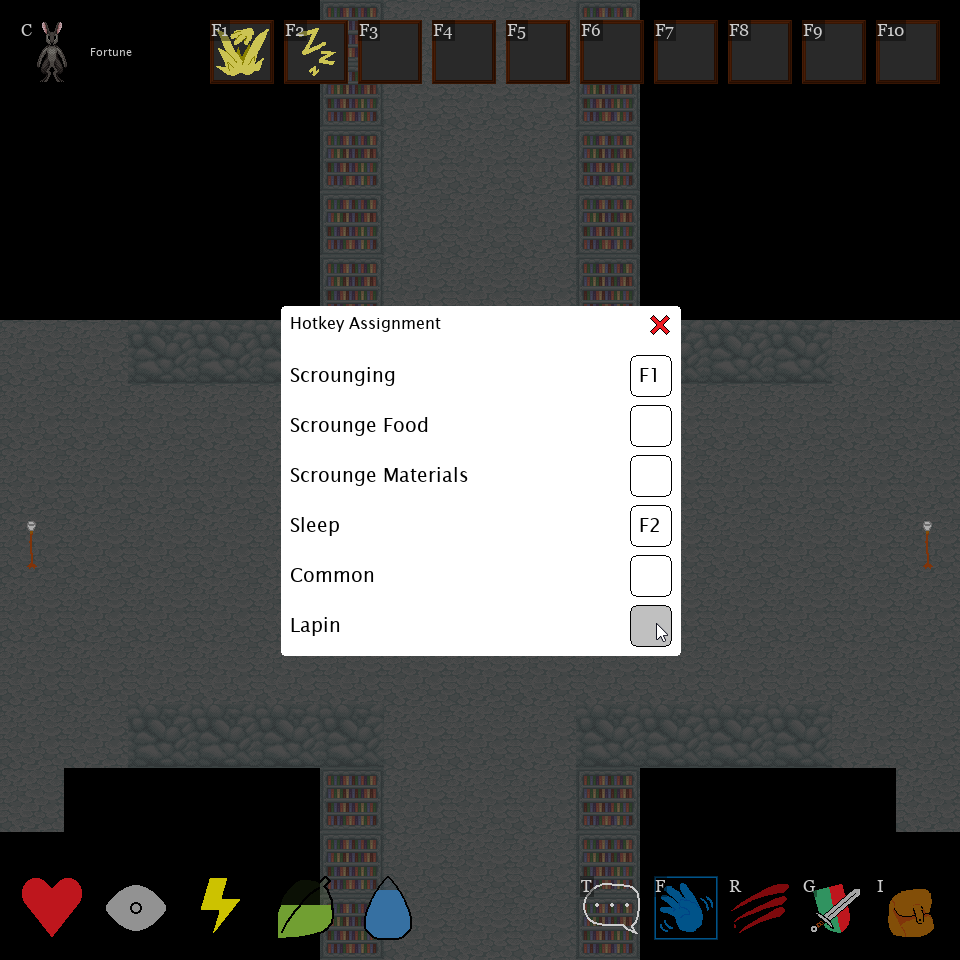
To begin with, only Scrounging and Sleep have been assigned to the action bar. You will notice that several more are available to you, even without learning any skills. You can scrounge specifically for food, or for crafting materials, though this lowers your chance of finding them. You can also switch between racial languages that you have learned, including your racial language. Clicking on a hotkey assignment box and pressing a function key will assign it to the corresponding key in the action bar.
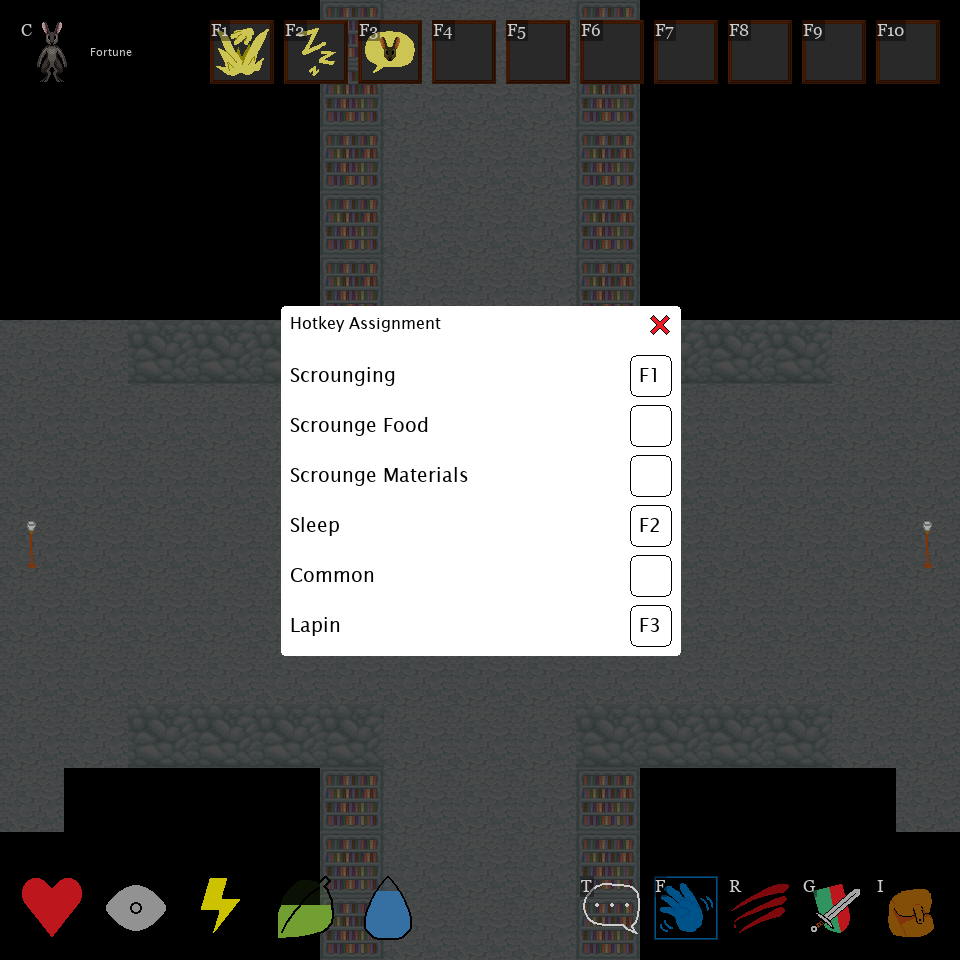
As you can see, we have assigned Fortune's racial language, Lapin, to the F3 key, adding its icon to the corresponding slot. By pressing that hotkey, Fortune will begin speaking Lapin, and only others who speak it will be able to understand them. To switch back, you will need to assign the Speak Common action to a hotkey as well. Whenever you learn a new active skill, it will be automatically added to your action bar if there is room, but you can come back here to rearrange and remove them as you see fit.
Resources and Needs
(top)This HUD provides an overview of your character's status, which you can hover over with your mouse to get a more detailed picture. On the far left, represented by a heart, is your Health meter. When your character's health reaches zero, they will pass out. You will not be able to wake up again until you regain at least one point of health. This won't wake you up automatically, however; if you suspect that getting back up will just result in you swiftly being smacked back down, you can remain unconscious for a while longer, as you cannot be hurt while asleep. Just be aware that everything on your person is up for grabs by anyone who rifles through your body in the meantime!
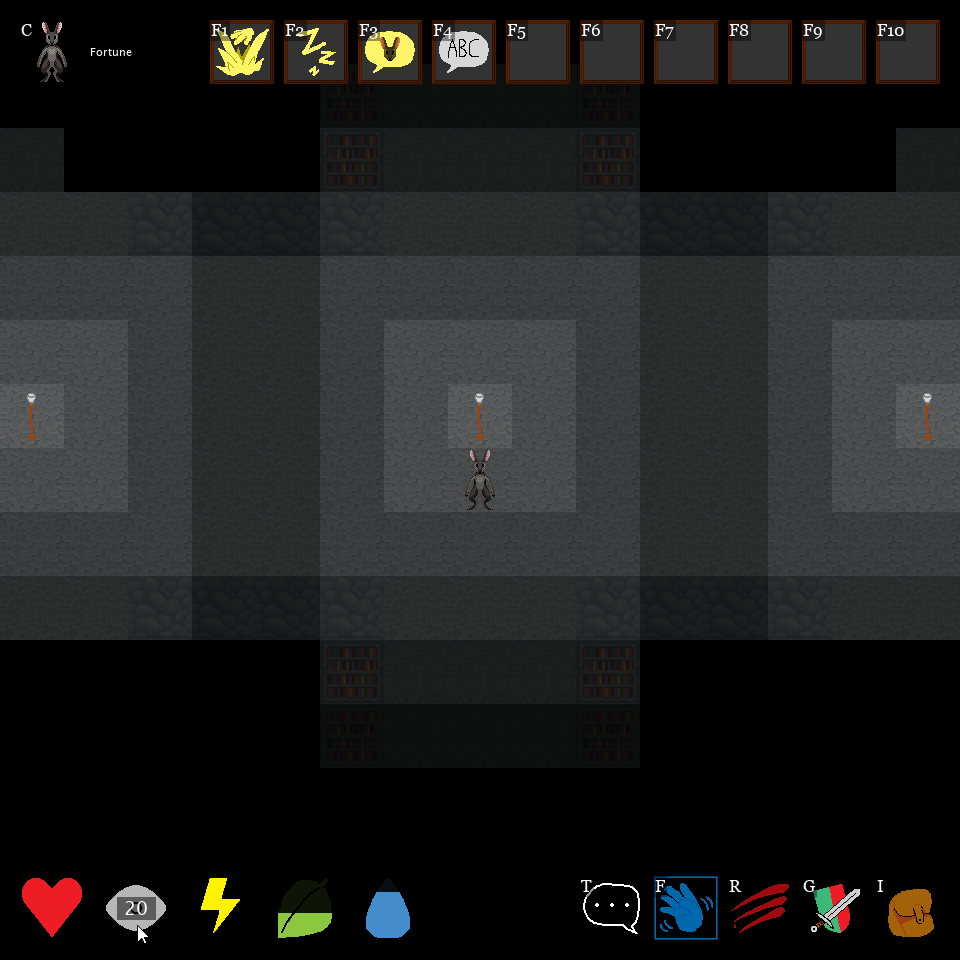
Next to that is your Mind meter, represented by an eye, displaying your mental resources. Doing things that require mental energy, like scrounging or crafting, will consume Mind. Next to it, represented by a lightning bolt, is your Stamina meter. Stamina is your physical energy, for doing things like fighting and crafting. All three of these resources will regenerate naturally over time, accelerated while you are sleeping.
To the right of them are your Hunger meter, represented by a leaf, and your Thirst meter, represented by a droplet. As you may have read in the basics guide, keeping these topped up is important, and they will only deplete over time. What you may not know is that most cooked foods and brewed drinks, if eaten while your meters are still high, will provide a lasting buff preventing you from getting hungry or thirsty again for a while. So if you have access to better food, you should eat it right away as soon as you start to get hungry! Scrounged food won't provide the same benefit.
Message Backlog
(top)The message backlog is a convenient way to review messages you've received during a session. In addition to system messages, you can find all dialogue from other characters here, so if you're not paying attention when someone tries to talk to you, the message won't be lost to the ether forever. Messages stored in the backlog are also saved to your hard drive, under AppData\Local\Farwoods. This way you can review all your logs from previous sessions in case you need to reference something.
Intent Modes
(top)You can swap between hostile and friendly intent with the click of a button or the press of a key, though hostile intent is unavailable inside the Morenth Library. Intent determines what actions are available for you to take as well as what double-clicking on other characters does. In friendly intent you will look at a character by double-clicking on them, but while in hostile intent you will attack them with your weapon (or your bare paws if you haven't got one equipped). You will also need to enter hostile intent to loot an unconscious critter. Some skills are available while in friendly intent even though they are arguably hostile, like pickpocketing, because they are stealthy skills which only reveal your intent if you fail them. However, even these skills are unavailable in the library.
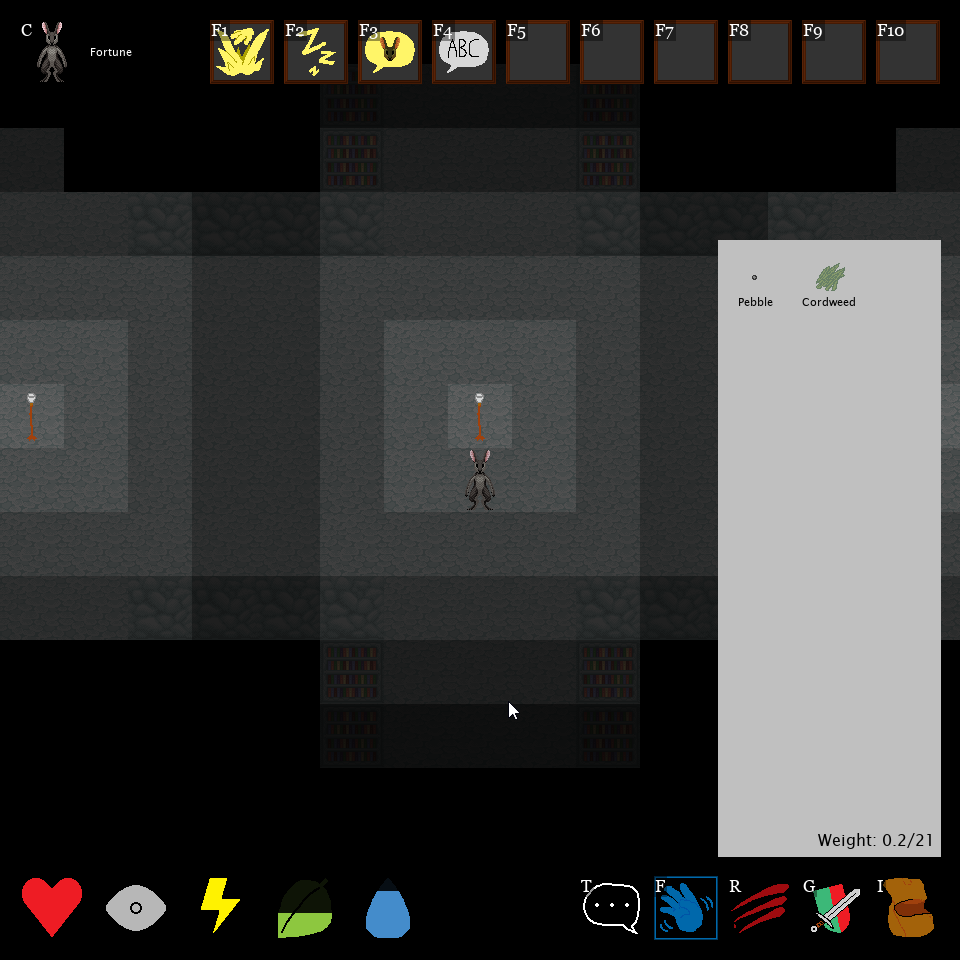
Gear and Inventory
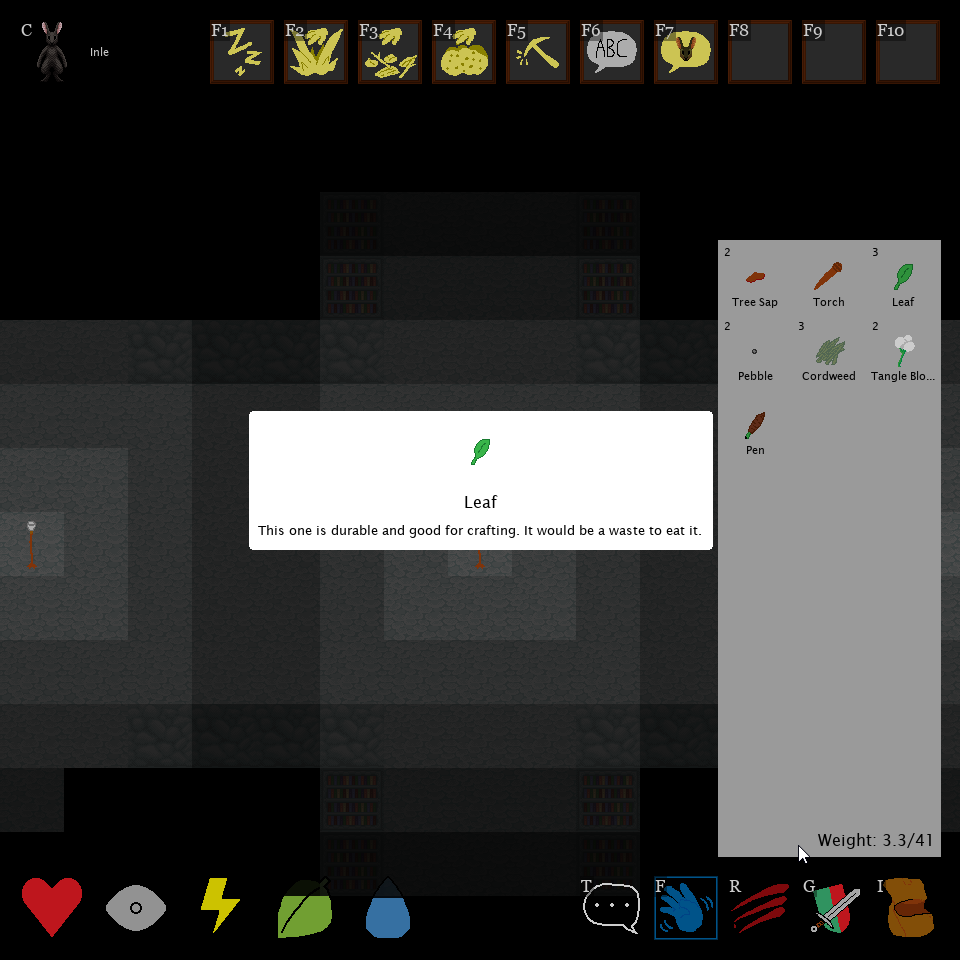
(top)Your inventory is probably among the more complex UI elements you will be interacting with a lot. All the items you're carrying are displayed on a list when you open the inventory. You can right-click on them to open a context menu with options appropriate for the item. Double-clicking on an item in your inventory is a shortcut for looking at it, whereas double-clicking on an item on the floor will attempt to pick it up. You can also right-click items on the floor for more actions, primarily looking at them.
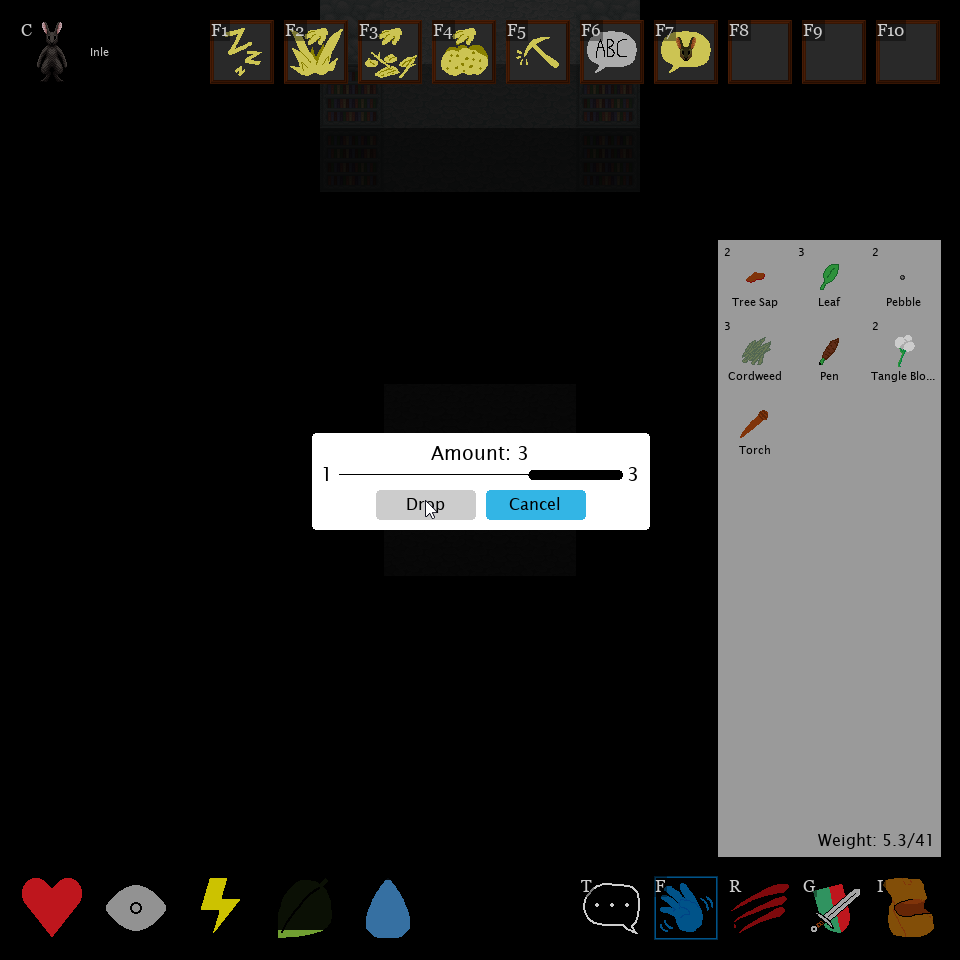
The Hold action will transfer the item to your hand in the Gear menu. This is useful for quickly equipping weapons, or carrying around objects you want other people to be able to see. Dropping an item will place it on the floor underneath you, as will clicking on it and dragging it out of the inventory menu, unless you drag it on top of a container like a countertop. Then you will be able to place the item on or in the container, perfect for shop displays and the like. If you have a stack of items, clicking "drop amount" will open a menu allowing you to choose how many items you want to drop, defaulting to all of them.
Scrapping items works similarly to dropping them, but the item is deleted forever, rather than being placed on the floor. Finally, looking at an item or character will bring up a popup showing you their description, including important details like durability for equipment and relevant stats for skillbooks. You can also double-click on items you see while looking at a character to look at those items on their person. And if you double-click on yourself, you can set your own description! Please note that Game Maker Studio does not provide word processing UI tools, so basic editing functionality like moving the typing cursor around a paragraph is unavailable at this time.
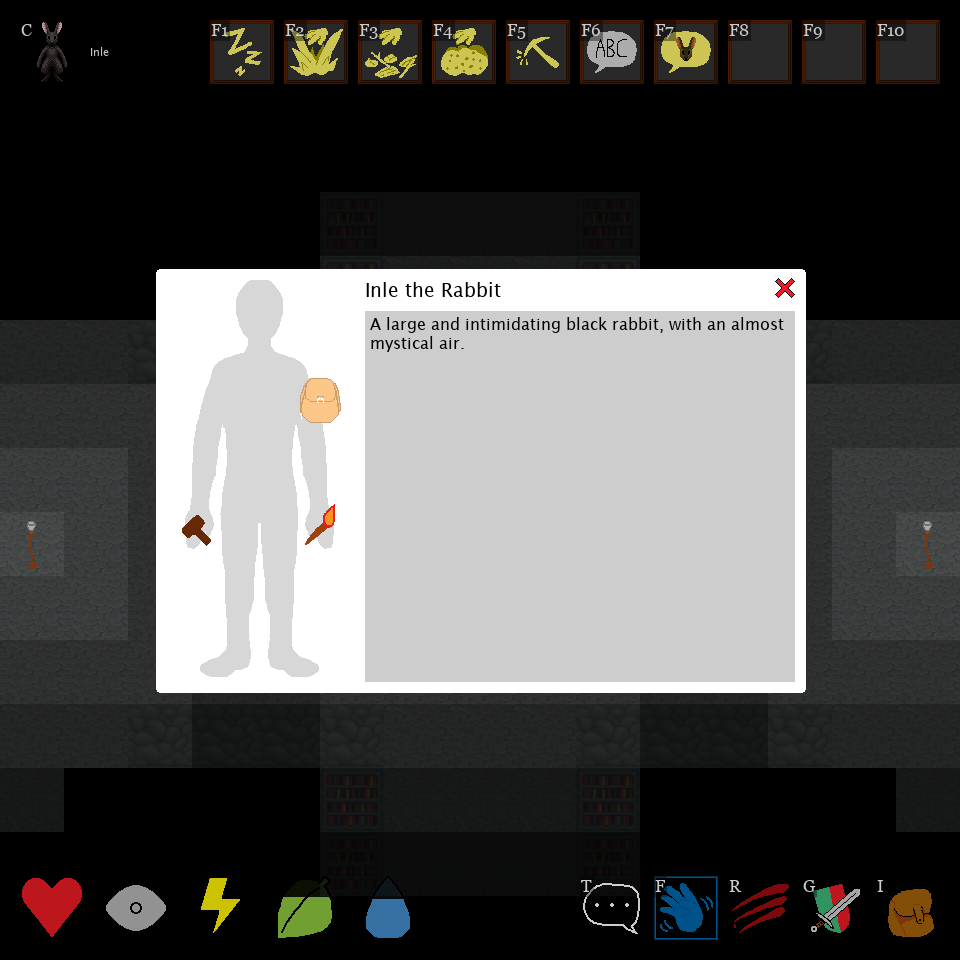
Pressing G will open up the gear menu, where you can equip items. In order to use weapons, you have to hold them, though which hand you hold them in isn't important. The same goes for wearing armor, and taking advantage of packs that will improve your carrying capacity. To equip something, you can either use the context menu in the inventory, or simply drag it back and forth between the two menus. Note that things you are holding and wearing do not count towards your carrying capacity.
Crafting
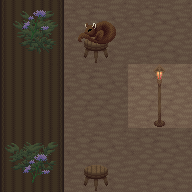
(top)You may have noticed the "Craft" option in the context menus in the inventory. This will open the crafting menu with the selected item as an ingredient, but you can also simply press M to open it at any time. If you don't have any crafting skills, this menu will be blank. However, if you have learned some, all the recipes that you are able to make with those skills will be listed. There is a search bar on the top left which you can use to search for recipes by both name and ingredient, and when you click on a recipe its details will be shown in the right pane.
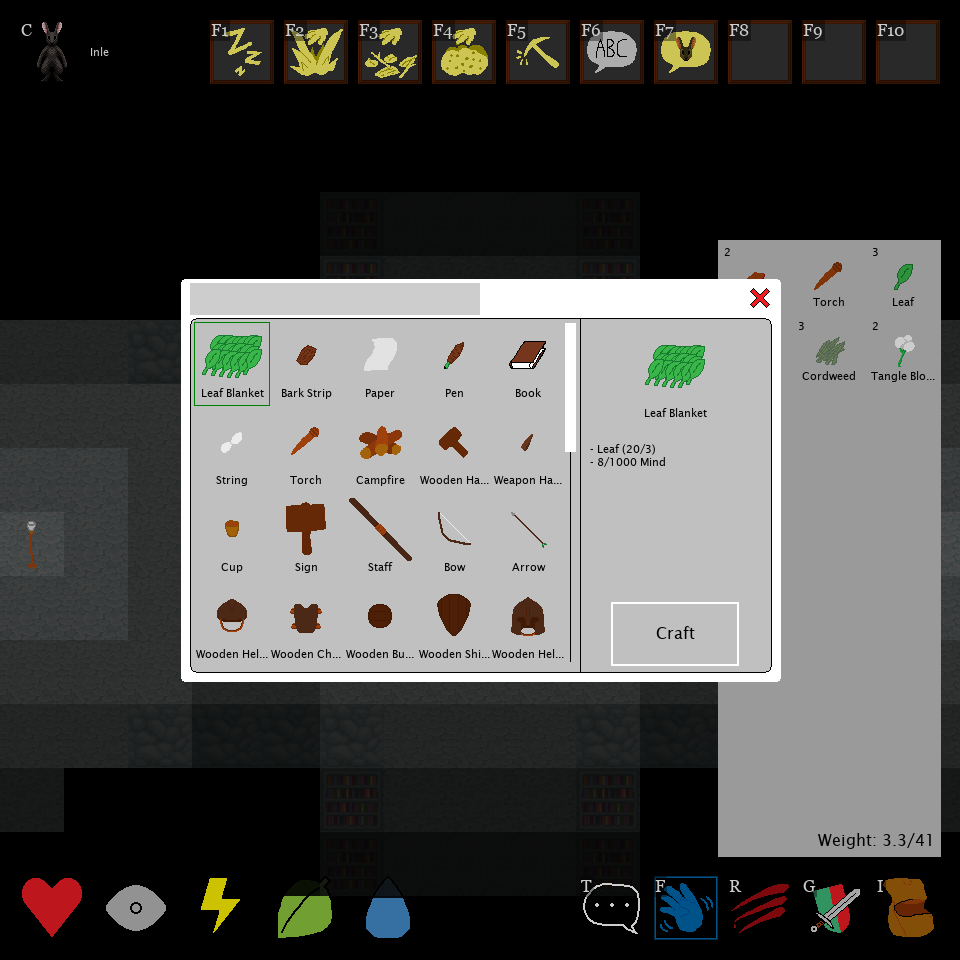
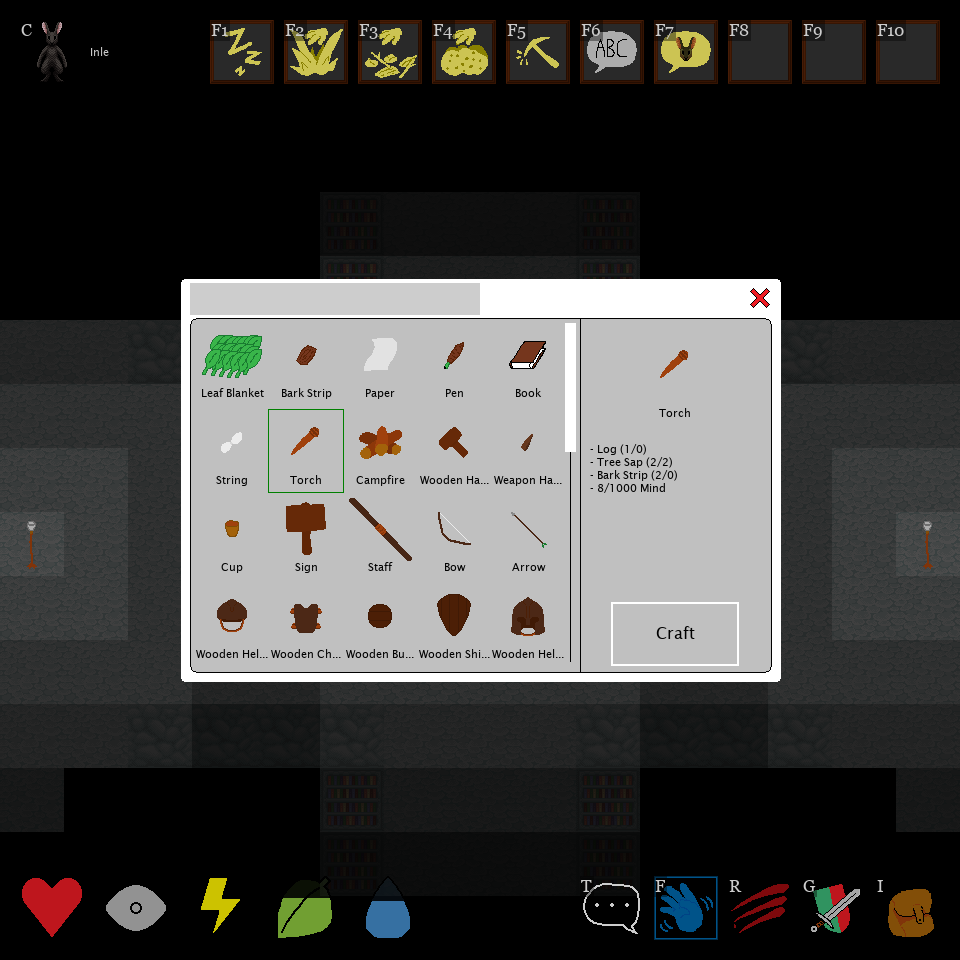
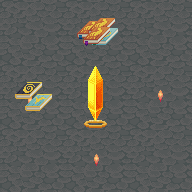
You can see here that clicking on the torch option displays that in order to make a torch, we will need 1 log, 2 tree sap, and 2 bark strips. Our character has the tree sap, but zero logs or bark strips. The recipe will also use 8 Mind from our mental resources when we attempt to make the item. Without meeting all of these requirements, the Craft button will be disabled.
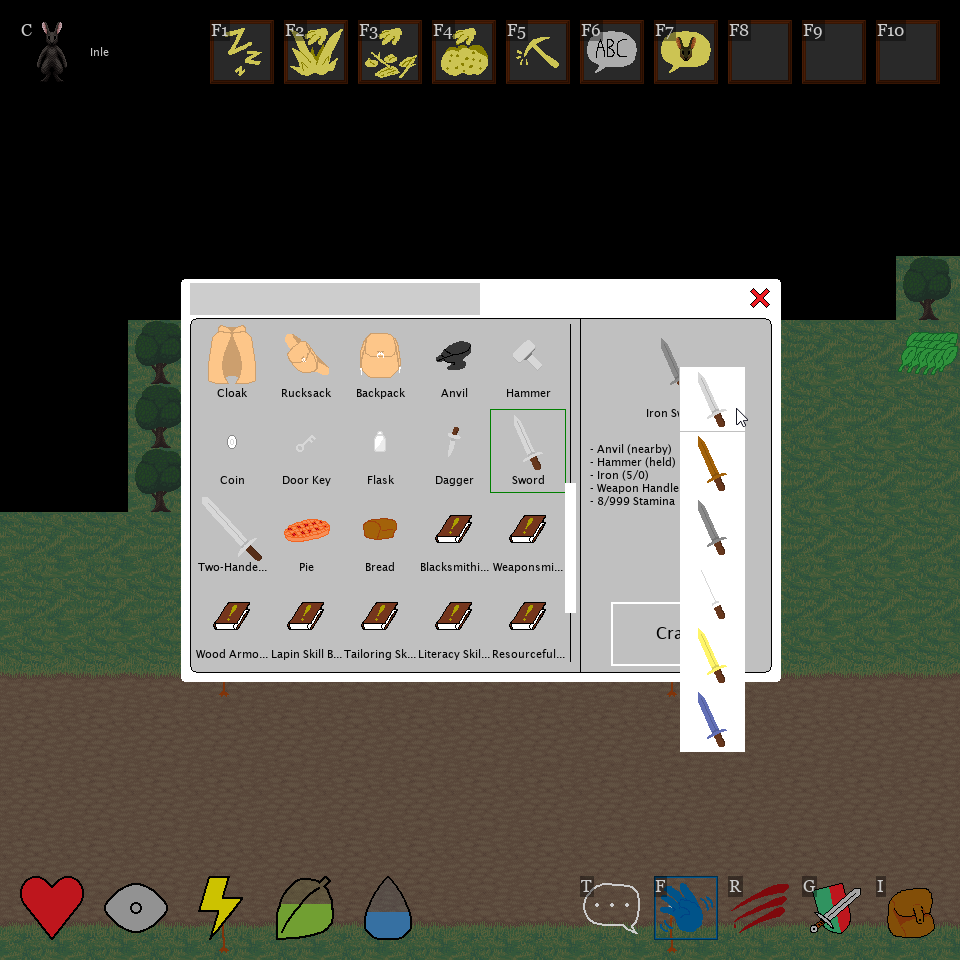
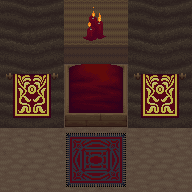
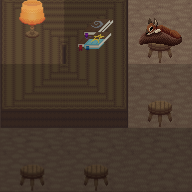
Some items, like this sword, have additional requirements. This recipe requires both that we are adjacent to an anvil in the world, and that our character is holding a hammer. You may also note the arrow in the bottom right corner of the item's icon; this indicates that clicking on the item will bring up a list of alternate versions we can craft. For smithing, this allows us to change the primary metal the item is made out of, but it also has uses in cooking and brewing, et cetera.
That brings us to the end of this user interface guide. Now that you've familiarized yourself with the game, maybe you'd like to dive a bit more depth into some of its systems? Feel free to check out the guide on crafting, the guide on combat, or the guide on magic depending on what you're interested in doing in the game.